• Welcome to the Two Wheeled Texans community! Feel free to hang out and lurk as long as you like. However, we would like to encourage you to register so that you can join the community and use the numerous features on the site. After registering, don't forget to post up an introduction!

Sparky

F-Ride

0
Joined
Oct 31, 2015
Messages
232
Reaction score
2
Location
San Antonio
First Name
Fred
The life of my 2016 Yamaha WR250R humbly started with careful PDI and a 5 mile dealer test ride. I brought her home, tucked her in, & named her "Sparky." Now with 150 miles, she is Tagged, TX Park enabled, and sporting her first mods:
- Skid Plate by Flatland Racing
- Tusk D-Flex Hand Guards
- Tusk Tail Rack

4a50c542d3f33f162eaeb25e146ce9fe.jpg
 
All clean and purdy... Sweet ride! :thumb:
 
Beautiful motorcycle!

Now, take it outside and kick it over. :eek2:

The first time you drop it out on the trail there will be two great traumas to experience. One, you just hit the ground and something hurts that shouldn't. Second, your beautiful shiny motorcycle now has a nasty scratch where it used to be smooth and pristine.

Kicking it over now and getting that first blemish will allow you to focus on the pain and frustration of hitting the ground/tree/log/rock/deer/four-wheeler/etc. and not be overly concerned with cosmetic mechanical issues. It all works sort of like a vaccine.

Just friendly helpful advice. ;-)
 
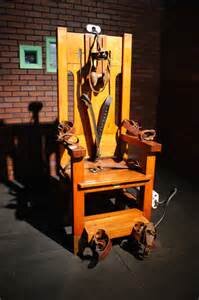
Oh. I saw the title and thought..... Never mind. :oops:
 

Attachments

  • electric chair.jpg
    electric chair.jpg
    10.5 KB · Views: 326
Great bike!

Yesterday I had to choose between mowing the yard and charging the battery on my WR. A 20 mile gravel road loop charged it nicely!

Enjoy it and welcome.

Sent from my SAMSUNG-SM-G900A using Tapatalk
 
Sparky was good last year and Santa brought her a few gifts to help us on our first major adventure in Big Bend National Park. With 526 miles it was time for Oil & Filter and:

- IMS 3.1 Tank

- Rim Locks front & rear

- 12v Cigarette Power Plug


7e9965bee76c14c8fc08b7995025011c.jpg
 
Wow that's a lot of rim locks. I've never felt the need for one on the wr but I guess it can't hurt.
 
Lol - just two on rear wheel the other items (8 O'clock Position) are wheel weights. I thought it best to balance the wheels. I added the Rim-locks for piece of mind mostly. Good to hear you haven't needed them.
 
Lol - just two on rear wheel ...

Asking out of sheer ignorance, why two? I don't think I've ever seen more than one per wheel.

And, btw, straight from the mouths of highly experienced off-road racers and bike-builders at Baja Rally 3.0 after I hauled balancer and assorted weights to Ensenada: "Nobody balances dirt bike wheels." :rider:

Two set 30 degrees apart is supposed to help balance the wheel and be easier on your spokes. I don't balance dirt bike wheels either.
 
Two set 30 degrees apart is supposed to help balance the wheel and be easier on your spokes. I don't balance dirt bike wheels either.

Thanks!

At first thought, I could maybe see two spaced 120deg apart from the valve stem helping balance but I can't see two spaced 30deg apart making any sense no matter where positioned.

So I went to the East Bike Parts & Camping Gear Warehouse (AKA, front bedroom) and laid hands on two, a front and a rear, and weighed them. F = a hair over 2oz and R = ~3.25oz (71yo postal scale, only graduated to 1/2oz). I also took a close look at the OEM EXC500 wheels they came out of (when we installed mousses in September) and the holes are at ~40deg from the valve stem holes.

:shrug: but I'm pretty sure I don't know more than the Engineers who spec'd them in Mattighofen.
 
395 miles in BBNP in 2.3 days. Sparky and I enjoyed Old Ore RD, West-East River Rd, and a good portion of pavement sights. All mods worked without fail and no surprises during the adventure :sun:
 
The extra capacity tank is a must-have. Especially if you're a big guy like me with a heavy wrist.
 
And the very next thing you're going to want is a Seat Concept seat. Holy CRAP what an improvement that is!!! :rider:
 
Who knew modifications would be fun? Sparky is soon returning to Big Bend NP with Round-3 of Ergo-mods.

1. Wolfman Expedition tank bag
2. SAE power plug
3. Tusk 30mm Bar Risers
4. Pivot Pegs

Now I can store some essentials in quick reach, charge electronics, and upright riding position should be much friendlier.

a7e7ca42b5dfbb51d30d340e2f986f4a.jpg
 
Christmas came early for Sparky because she was just that GOOD !! At 4,457 miles it was time for some new shoes. I went with Pirelli MT21 up front & Dunlop D606 rear. Since the D606 is a full inch larger in diameter than the stock Trailwings, that would dictate other mods. Gearing went to 14/50. The 14 up front in effort to help prevent chain slider wear. Mine was about 40% worn, but replaced it anyway since I anticipated wear and wanted to test the 14 theory.

4e1eee9bd9f700ea406e8c1f35fbc591.jpg


The D606 increased the seat height that all but negated the Seat Concepts mod. (Stock is 36.6 minus Seat Concepts Low .75 = Just under 36") So I did the lower mods of adjusting the shock linkage bolt & raising the forks in the triple clamps accordingly. (See before and after seat height photos.) This also helped keep her upright on the side stand.

Since I had the wheels and shock linkage apart, I gave the bearings a look-see, and added Bel-Ray waterproof grease to keep things in order.

Lastly, while Sparky took excellent care of me by not getting a flat, I did a Ride-On sealer inspection. Since I can not confirm the operational claims of this product due to not experiencing a puncture, I was curious to see if there was any sealer still inside the tubes. Below is what remains after one year, 4,000+ miles of the 7 oz in the rear tire. As you can see the color changed and about 1/3 of the product (some still clinging inside tube) has evaporated. Nevertheless, I will be using it in the new tubes as well.

6e8d5d8aa73ec310cc18e8539e76f446.jpg


Merry Christmas Sparky, I know you want to go to Big Bend again...
 
Ride-On is good stuff. I used to wear out tires fast enough to reuse tubes with Ride-On but not anymore. Thanks for bring up the need to consider time between tube changes. I'll email Ride-On for their advice.
 
Sparky got a comfort mod, with the installation of Cycle Gear heated grips. The budget $20 on sale version. Since I had plenty of extra wire to make all the connections and I wanted to keep the Pillow Top grips, I chose this labor of love instead of going with a complete package like Oxford.

First step was to figure out the wiring as the grip heaters came with limited instructions. I used the Black/White wire behind the headlight as the ground connection. Then I used the Blue/White wire from the headlight relay as "Control" power. This relay is located on left side of bike to the rear of the bike, or just about 8" to the right of the battery. Its tucked up tight along the frame. "Control" power is routed to 87 on the relay ($7 Auto Zone). This power energizes the relay and allows the "Operating" power (30 on relay) to flow. Like a light switch turns on the light, the relay is turned on. The headlight relay wire I used Blue/White is only energized when the engine is running. A neat feature of the WR250R wiring design. So the heated grips will only work when the engine is running. The "Operating" power is taken from the battery with in-line 7amp fused link, that I had as left-over wiring. I replaced the cheep plastic hi/low switch with a rubber covered 3 position switch from Rocky Mt. ATV ($5), and while I was there I got two small green LED's for another ($5) and new set of Pillow Top grips ($12).

1546f5c5e392a1185f6818d994b1b146.jpg


Next, I needed a location to mount the rocker switch, and found inspiration from Highway Dirtbikes handlebar mounts. So I bought a small galvanized plate at Lowe's ($1.14) and commenced to shaping. This process took considerable amount of time and patience working with hacksaw and small dremel. I also need a place to mount the resistor that comes hard wired to the grips. This resistor turns current into heat and reduces the current to the "low" side of the grip power. It gets very hot (measured @ 150°) and should NOT be placed next to anything that might melt !!! So I chose to mount it inside a small metal pipe ($1) with some JB Weld ($7). I mounted the resistor/pipe assembly under the handlebar crossbar with a pipe clamp.

1582c31ef7fdb4f3c2480a9e5aefb808.jpg


With everything wired up I was able to test function. The heat output 94° on Low and 114° on High. Some choose to not wire up the Low side of the grip heating and eliminate the resistor heating thing all together. With my thin Pillow Top grips I wanted both settings to work and thought I would pass on some actual heating measurements. Everything worked, so was time to mount it all up and tidy up the wiring. I put a zip-tie around the grip wiring connectors to help keep them in place from possible movement. I used some heat shrink tubing around the two throttle side wires to make it stronger as they move 1/4 turn with throttle use.

6f5eda0201d68c9bde5300848e5d5dd8.jpg


I ended up making a few modifications to my switch mounting plate as the first one was a bit too large and blocked view of the instrument panel. I mounted a small voltage meter inline with the turn signal indicator LED's. I ditched the HI/Low indicator plate as this is a trail bike and I like the simple unlabeled look, and sprayed the plate with a few coats bedliner paint. I used a small section of old inner tube to form a shield in front of the plate where the switches were exposed. Even though I used water-proof connectors and shrink wrap tubing around them.

362d7fcd3f20720672c8754c48c40597.jpg


Here is the final Aux-Dash. Unobstructed view of OEM dash. Hole on right side of voltmeter is for another switch to operate Aux Driving Lights in possible future mod. Everything worked over the recent 2-day, 550 mile ride:
http://www.twtex.com/forums/showthread.php?t=112821

All together it cost about $60 for this mod. I probably got a little carried away with the turn signal LED's, as I still leave them on at times (ha-ha). They have glass lenses and can sometimes be hard to see in direct sunlight. The WR voltage ranged from 13.6-14.1 and is nice to know. The grip heat on "Low" was perfect under my Pillow Top grips in mild 60-70 degree temps and thin gloves. What a comfort to have my hands warmer than my face. On the "High" setting, they were very warm and heat the stock steel bars up quick. I soon turned them down to low, but think they will be great in 50° temps or below on those high elevation BDR sections. As mentioned earlier this really was a "labor of love" as the 2hr install turned into more like two days. But, I must admit the satisfaction of custom set-up is very rewarding.
 
Last edited:
Back
Top