


 Feel free to hang out and lurk as long as you like. However, we would like to encourage you to
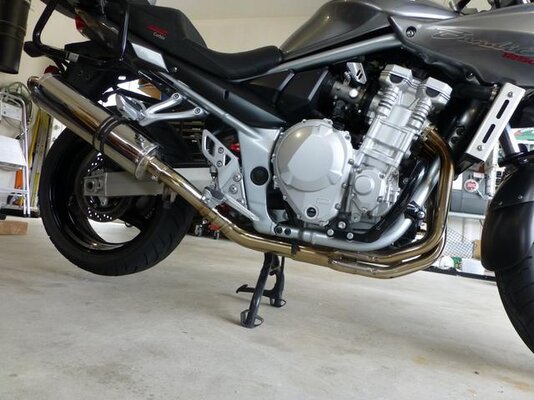
 OK, it was definitely more of a pain in the rear than it should have been. It was $305 shipped, which is very fair compared to $700 holeshot or arrow headers. It is definitely at least 10 lbs lighter than OEM header
Things that annoyed me and may help others resolve possible issues in the future:
1. The collector sits too close to the mount point, resulting in yoshimura rs3 pipe hitting the swing arm. By putting a spacer between the collector and the mount point, the issue's resolved. No additional cost
2. first fit resulted in #2 header pipe not lining up, and once it was forced, I could not line up the collector mount point, as it was 3/4" off. I changed my tactics (see below)
3. I ground out the weld burrs in #2 pipe collector on the inside, and cleaned out the rest of the collector flange welds on the inside. I managed to get an extra 1/8 to 1/4" of the pipes to fit in.
4. I decided that it's a lot easier to loosely mount the collector with pipes 1 and 2 installed (as springs are a pain to put on from the other side), and then slid pipes 3 and 4 in, and installed the springs
5. Slip on is slightly deviated from original location, but this isn't crucial. It was initially hitting the swing arm until I spaced out the collector mount and suzuki frame mount by about 1/2".

Overall, it took me longer than anticipated to get this installed. Is it worth saving $400 with the amount of labor and modifications I had to make? yes.
I haven't fired it up yet, as I still need to fill the oil, hook up cooling system, remove secondary butterflies, hack up the airbox to finish stage 2 holeshot mod, and re-sync the throttlebodies and check TPS position
Things that annoyed me and may help others resolve possible issues in the future:
1. The collector sits too close to the mount point, resulting in yoshimura rs3 pipe hitting the swing arm. By putting a spacer between the collector and the mount point, the issue's resolved. No additional cost
2. first fit resulted in #2 header pipe not lining up, and once it was forced, I could not line up the collector mount point, as it was 3/4" off. I changed my tactics (see below)
3. I ground out the weld burrs in #2 pipe collector on the inside, and cleaned out the rest of the collector flange welds on the inside. I managed to get an extra 1/8 to 1/4" of the pipes to fit in.
4. I decided that it's a lot easier to loosely mount the collector with pipes 1 and 2 installed (as springs are a pain to put on from the other side), and then slid pipes 3 and 4 in, and installed the springs
5. Slip on is slightly deviated from original location, but this isn't crucial. It was initially hitting the swing arm until I spaced out the collector mount and suzuki frame mount by about 1/2".
Overall, it took me longer than anticipated to get this installed. Is it worth saving $400 with the amount of labor and modifications I had to make? yes.
I haven't fired it up yet, as I still need to fill the oil, hook up cooling system, remove secondary butterflies, hack up the airbox to finish stage 2 holeshot mod, and re-sync the throttlebodies and check TPS position


")