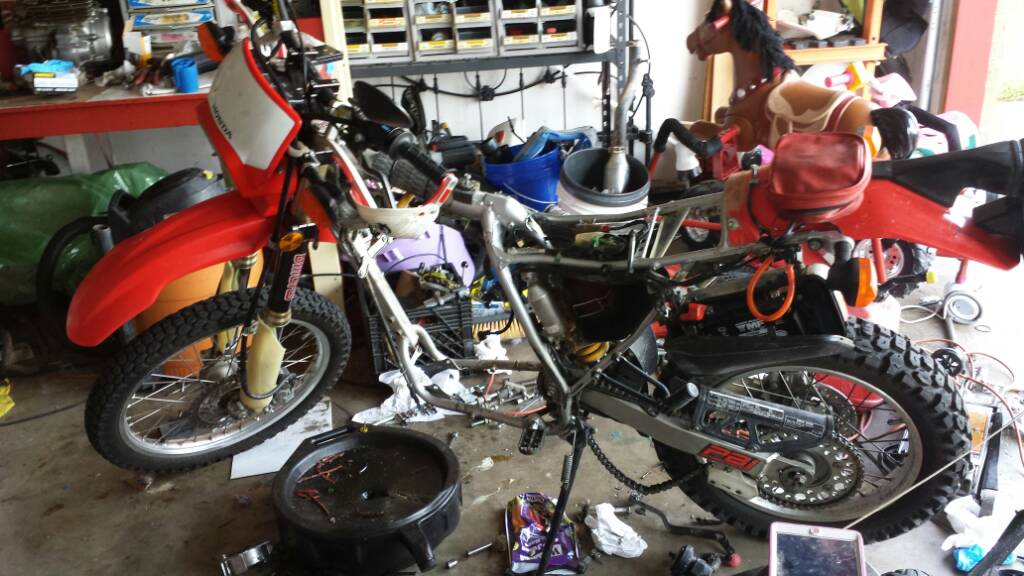
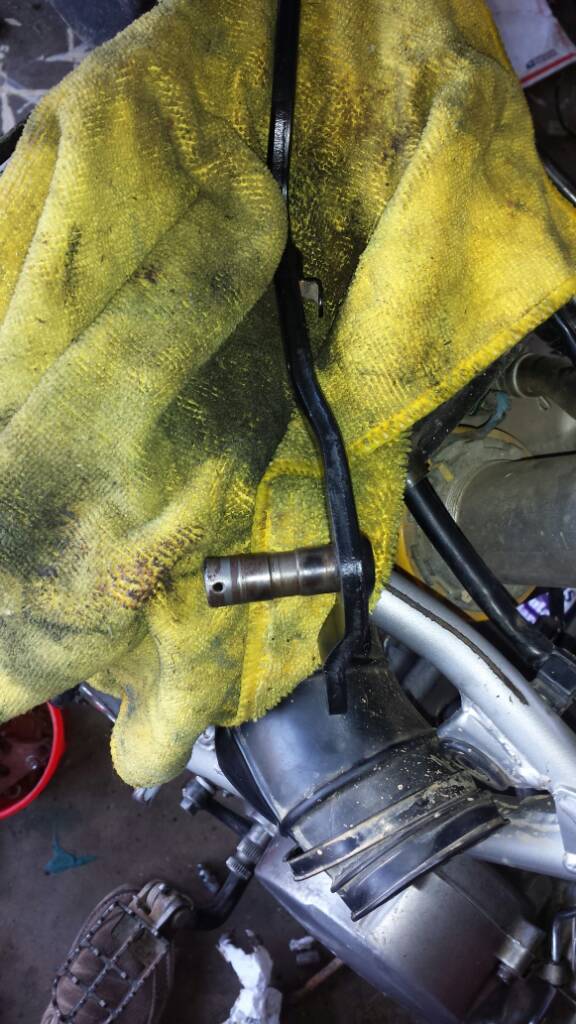
Nice workbench Bluff. Now go re-route that brake line on the Honda before you snag it on something.


-
 Welcome to the Two Wheeled Texans community!
  Feel free to hang out and lurk as long as you like. However, we would like to encourage you to register so that you can join the community and use the numerous features on the site. After registering, don't forget to post up an introduction!
You are using an out of date browser. It may not display this or other websites correctly.
You should upgrade or use an alternative browser.
You should upgrade or use an alternative browser.
My XR650L retro fit, Back to the Future
- Thread starter bluffskier
- Start date
I do need to secure and shield my tubes! I just have the odometer cable free aired up.Nice workbench Bluff. Now go re-route that brake line on the Honda before you snag it on something.
Getting some help parting out the XRR
Eventually got the rear fender off.

Ricky Stator installed.

I ordered my new bolt for the valve cover, exhaust gaskets, and my new timing plugs. I wanted some aftermarket timing covers, but the OEM was the only one I could find, and the price was right.
Going to get my XRL inspected this week, before the swap.
Any one need some XR600 parts? I have the forks, src fork brace, front wheel, disk, handle bars, rear shock. And some odds and ends. Need to fund the build.
I'm going to run the XRL harness and remove what I do not need. There is a good write up on how to run an XRR CDI in an XRL, using a Ricy Stator, which is what I'm doing in a way.
Sometimes, I go through a crises of confidence in my builds, but when comparing the conditions of the bikes, I realize that my mint XRL is the platform to mod into what I want. My end product will be heavier than the XRR, but not by much if I play my cards right. This is just the first part of the build, the bike is coming apart this fall again to split the cases and work on any improvements I dream up.
People say it's not worth the money and time to convert an XRL into an XRR, but if you buy a hoopty XRR for 800 bucks (the first one I should of gotten, wife got mad, so I went behind her back and bought this one), then part it out and sell your complete, low mile, running, great condition XRL engine for 1100-1300 bucks, then the project pays for itself.
Sent from a pay phone
I really like where this is going. Did you ever get any meditation/vaping done while considering your carb set up?
I'm gonna tune out the FCR. If I can not get it bog free, and by bog free I mean idle to WOT in a split second, I'm gonna run the XR's only Mikuni I have from the XRR. It's not a pumper, but appears bog free from initial tests. With the FCR I'm going to disconnect the AP and tune tue bog out as much as possible, then time and adjust my spray.I really like where this is going. Did you ever get any meditation/vaping done while considering your carb set up?
Sent from a pay phone
Just charge up the rotary appliance and let the creative juices flow. Hahaha.
Hey man, I'm about where you're at with the carb thing. I'm a fan of simplicity. As cool as it'd be to have a retrofit crf250 FI system feeding the xr4, I've got it in my mind I can get the stock carb how it needs to be.
I think the mikuni pumper is giving me grief.
Hey man, I'm about where you're at with the carb thing. I'm a fan of simplicity. As cool as it'd be to have a retrofit crf250 FI system feeding the xr4, I've got it in my mind I can get the stock carb how it needs to be.
I think the mikuni pumper is giving me grief.
Edgar Cayce's radial appliance is good stuff. It's other world technology. It took awhile to source my materials, but now I have it built, I use it from time to time. I've had it about a year now.
http://radialappliance.teslabox.com/radial-appliance-readings/1800-28/
Sent from a pay phone
http://radialappliance.teslabox.com/radial-appliance-readings/1800-28/
Sent from a pay phone
Clutch plates are nearly 3mm each, right around 2.96mm.
Got to use my new Husky 1/4 torque wrench. I love it. Gonna pick up the Husky 3/8 one, it's made in USA too. I have a Harbor Freight 1/2 and a 3/8 torque wrench, but use them for external fasteners and such. They are good wrenches, given you take care of them and don't leave them loaded.
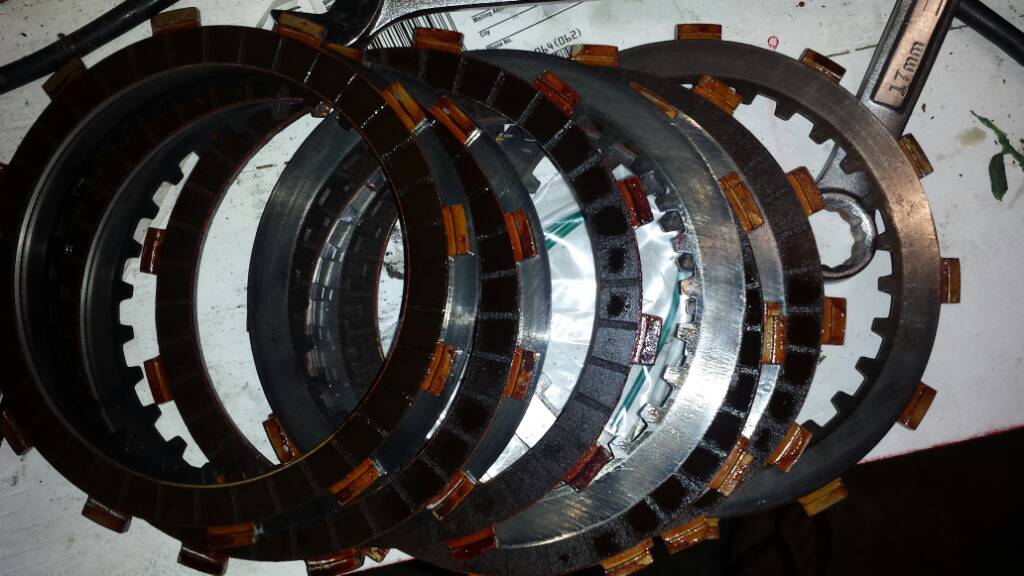
The clutch lever has a very hard pull. Maybe aftermarket springs? My XRL clutch pulls nice and easy.

Slightly worn splines???

No problem!
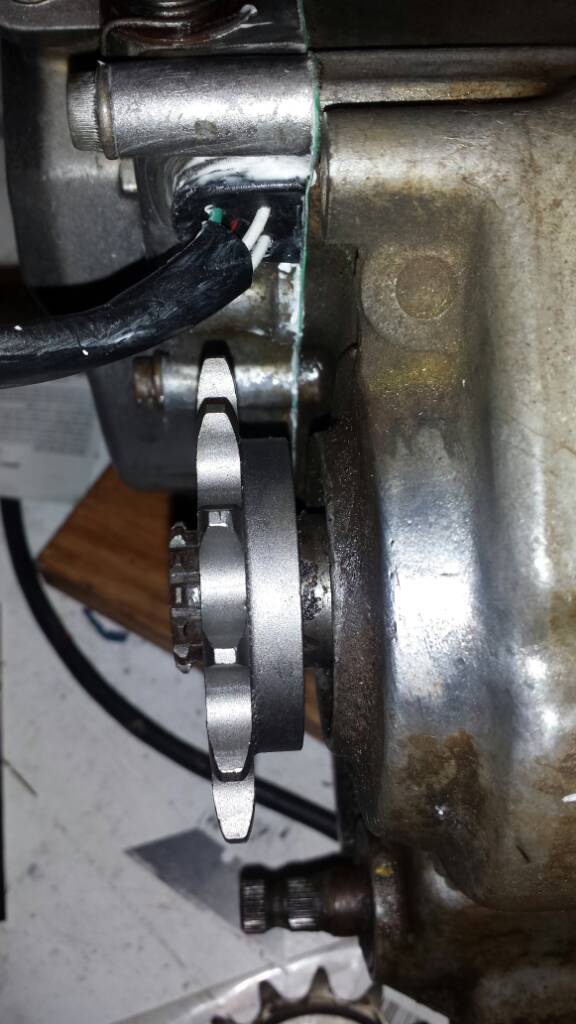
I have a nearly new $100+ RK chain and a $50 48T Moose Racing sprocket on the XRL, and I'm not taking any chances using an old CS sprocket trashing my chain. Besides I replace the CS sprocket once the teeth start to show wear. They seem to wear faster for some reason. I got 8k out of the OEM drive set.
My XRL chain slider is already worn to the new path of the XR650R sprocket too.
Gonna put the clutch cover on sometime this week.
Don't forget the dowel thing for the oil!

Sent from a pay phone
Got to use my new Husky 1/4 torque wrench. I love it. Gonna pick up the Husky 3/8 one, it's made in USA too. I have a Harbor Freight 1/2 and a 3/8 torque wrench, but use them for external fasteners and such. They are good wrenches, given you take care of them and don't leave them loaded.
The clutch lever has a very hard pull. Maybe aftermarket springs? My XRL clutch pulls nice and easy.
Slightly worn splines???
No problem!
I have a nearly new $100+ RK chain and a $50 48T Moose Racing sprocket on the XRL, and I'm not taking any chances using an old CS sprocket trashing my chain. Besides I replace the CS sprocket once the teeth start to show wear. They seem to wear faster for some reason. I got 8k out of the OEM drive set.
My XRL chain slider is already worn to the new path of the XR650R sprocket too.
Gonna put the clutch cover on sometime this week.
Don't forget the dowel thing for the oil!
Sent from a pay phone
Got the valve cover bolt tapped out.

Was gonna try and stack 2 helicoils dor more threads, don't know what I was thinking, but I like to say my daughter bugging me had something to do with it. She's always, always in the garage with me, even has a favorite chain she likes to play with. Working in refinery electrical construction doesn't help either. like if I mess up a piece if ridged conduit, I just grab another one, but I cannot source a head so easily.
Luckily I was able to fix my blunder and move on... now for the heart breaker, I'm having to use a mix matched bolt... I don't know why it bothers me so much. It's a perfect match, but a 10mm head. This almost has me questioning my entire project it's so bad, in my mind anyway.
Now to get some sealant for the metal gasket today and bolt down the cover tonight.
Sent from a pay phone
Got the valve cover bolt tapped out.
Was gonna try and stack 2 helicoils dor more threads, don't know what I was thinking, but I like to say my daughter bugging me had something to do with it. She's always, always in the garage with me, even has a favorite chain she likes to play with. Working in refinery electrical construction doesn't help either. like if I mess up a piece if ridged conduit, I just grab another one, but I cannot source a head so easily.
Luckily I was able to fix my blunder and move on... now for the heart breaker, I'm having to use a mix matched bolt... I don't know why it bothers me so much. It's a perfect match, but a 10mm head. This almost has me questioning my entire project it's so bad, in my mind anyway.
Now to get some sealant for the metal gasket today and bolt down the cover tonight.
Sent from a pay phone
What length do you need. I've got one with the 8mm head
I appreciate it, I'll just order a new one when I tear it down again.
Getting it apart.

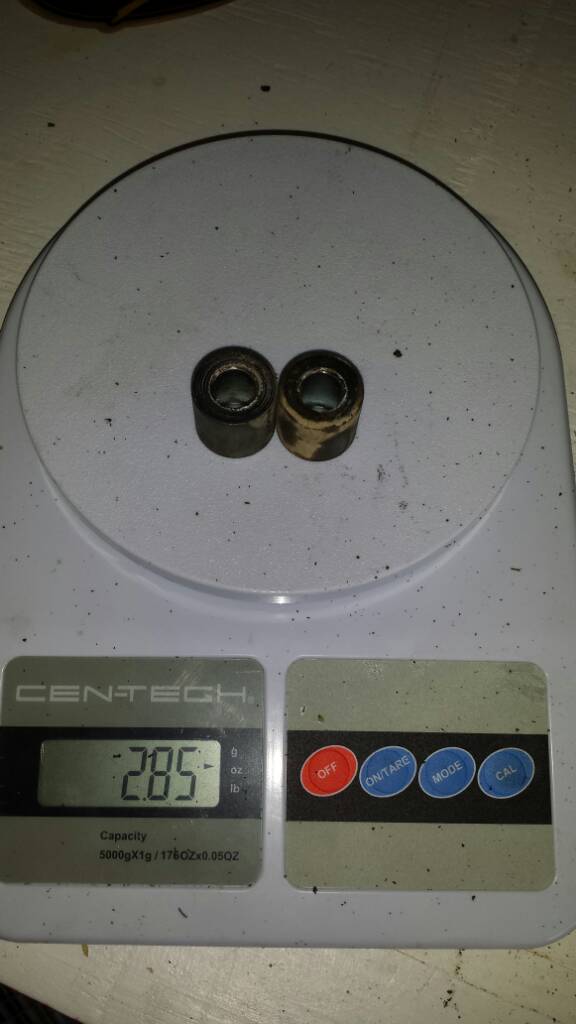
Xr600 engine spacers

Xrl spacers
I'm going to replace the XRL front caliper with a 2003 CR250 one I have, as it's lighter too, exact same fitment.
Let the haters hate... ZINC THAT SHEET.

My down tube screen was very clean.

Zero wear on the rear brake pivot. I lube it every few thousand miles.
Steel wool works wonders

Sent from a pay phone
Getting it apart.
Xr600 engine spacers
Xrl spacers
I'm going to replace the XRL front caliper with a 2003 CR250 one I have, as it's lighter too, exact same fitment.
Let the haters hate... ZINC THAT SHEET.
My down tube screen was very clean.
Zero wear on the rear brake pivot. I lube it every few thousand miles.
Steel wool works wonders
Sent from a pay phone
Last edited:
Don't forget the copper gasket spray in that metal rocker box gasket. I'll leak when you park it. That really S-L-O-W seeping oil leak, line what form around a rear differential cover. 
I used the copper goop on it. Didn't see the spray
Sent from a pay phone
Sent from a pay phone
I'll revive this thread.... Lol.
Progress on this bike is happening. He had the swap done, and took it to Arkansas for some killer trails. I wasn't there, but saw the videos.
Maybe he will post them.")
As of now, the XR6 engine is out of the bike. He freshening up the motor.
We've but agreed a 9.5:1 compression ratio is ideal. How were going to get there, or even close for that matter is still up in the air. Lots of ways to do it. Maybe a 650l cylinder, with a 600r big bore piston. Maybe the JE 11:1 with 2 base gaskets.
We've not decided.
I've got the head in my shop. The other day I soda blasted the carbon off of it, and assesed the casting flaws to be removed, as well as the condition of the guides and seats.
The name of the game on the head work is cooling (for this job). There are lots of gains to be had from a performance standpoint and those are not lost on us either. Polishing is done to reflect heat, rather than improve flow numbers. Flow characteristics, however, will improve. The dimensions and volumes in of the ports will remain pretty much stock. Just getting rid of the casting flaws, and blending the bowls to the seats.
The exhaust ports. I know there's still some carbon build up, but that'll be removed during porting, and polishing.


Intakes- the flashes are similar to those in every xr400 head I've seen.


The combustion chamber. It's getting new seats cut, to match the new KPMI stainless valves. Niceeee. I would've CC'd the head before, but that's hard do do without valves that seal. I'm not gonna get seats cut for new valves, THEN polish the chambers, and ports. (Only polishing the exhaust ports)

Initial polish. I may be able to get it smoother, then go back and re-polish. I'll make that call once we decode on a piston, cylinder, compression combo. I don't want to give up and compression yet, if the combo we use doesn't afford much to give up.


I'll rough-in the porting tomorrow, then mask off the surfaces I've already done, and bead blast the rest. After that, it'll get new seats, a paint job, and put back together.
Progress on this bike is happening. He had the swap done, and took it to Arkansas for some killer trails. I wasn't there, but saw the videos.
Maybe he will post them.
As of now, the XR6 engine is out of the bike. He freshening up the motor.
We've but agreed a 9.5:1 compression ratio is ideal. How were going to get there, or even close for that matter is still up in the air. Lots of ways to do it. Maybe a 650l cylinder, with a 600r big bore piston. Maybe the JE 11:1 with 2 base gaskets.
We've not decided.
I've got the head in my shop. The other day I soda blasted the carbon off of it, and assesed the casting flaws to be removed, as well as the condition of the guides and seats.
The name of the game on the head work is cooling (for this job). There are lots of gains to be had from a performance standpoint and those are not lost on us either. Polishing is done to reflect heat, rather than improve flow numbers. Flow characteristics, however, will improve. The dimensions and volumes in of the ports will remain pretty much stock. Just getting rid of the casting flaws, and blending the bowls to the seats.
The exhaust ports. I know there's still some carbon build up, but that'll be removed during porting, and polishing.
Intakes- the flashes are similar to those in every xr400 head I've seen.
The combustion chamber. It's getting new seats cut, to match the new KPMI stainless valves. Niceeee. I would've CC'd the head before, but that's hard do do without valves that seal. I'm not gonna get seats cut for new valves, THEN polish the chambers, and ports. (Only polishing the exhaust ports)
Initial polish. I may be able to get it smoother, then go back and re-polish. I'll make that call once we decode on a piston, cylinder, compression combo. I don't want to give up and compression yet, if the combo we use doesn't afford much to give up.
I'll rough-in the porting tomorrow, then mask off the surfaces I've already done, and bead blast the rest. After that, it'll get new seats, a paint job, and put back together.
Last edited:
Progress continues.
I did a really nice port job on this head, and really excited with how it came out.
I've got a VERY rudimentary set up for flow testing, but it works. It doesn't provide me with quantitive figures, but does reflect gains. Imagine if you will a toilet plunger cup, epoxied onto a small vacuum hose (hooked to shop vac), and then a spark plug hole apapter for a leak down tester with about 6' of clear vinyl tubing attached to make this. I do both intakes at a time, with the exhaust valves still in, then when I'm satisfied, swap everything and test the exhaust the same way. Again, this doesn't give me numbers, just shows an increase/decrease. It's not very comprehensive, but alot of "head guys" still use and love this old school method.
Here's the diagram I used to make mine.

Anyways, pics-

The exhaust is smooth, and buffed. Nowhere near mirror shine. I think that's a waste of time for the most part, and probably yields minimal gains.

This picture sucks, but the chamber looks nice, and the exhaust seats (as well as the intake) are very well blended to the bowl.

I had the seats cut and set in .020 to lower compression. We've decided that well go with a high compression piston, and give some of that increase away due to the polished head and valves set in a bit. His 60° cut was wide, and did well deshrouding the valves, as well as my work to the chamber.

I'll probably CC the head tonight, just so we know if we want to use 2 base gaskets, or if the current work will drop the CR closer to the 9.5 goal. Stay tuned.
I did a really nice port job on this head, and really excited with how it came out.
I've got a VERY rudimentary set up for flow testing, but it works. It doesn't provide me with quantitive figures, but does reflect gains. Imagine if you will a toilet plunger cup, epoxied onto a small vacuum hose (hooked to shop vac), and then a spark plug hole apapter for a leak down tester with about 6' of clear vinyl tubing attached to make this. I do both intakes at a time, with the exhaust valves still in, then when I'm satisfied, swap everything and test the exhaust the same way. Again, this doesn't give me numbers, just shows an increase/decrease. It's not very comprehensive, but alot of "head guys" still use and love this old school method.
Here's the diagram I used to make mine.
Anyways, pics-
The exhaust is smooth, and buffed. Nowhere near mirror shine. I think that's a waste of time for the most part, and probably yields minimal gains.
This picture sucks, but the chamber looks nice, and the exhaust seats (as well as the intake) are very well blended to the bowl.
I had the seats cut and set in .020 to lower compression. We've decided that well go with a high compression piston, and give some of that increase away due to the polished head and valves set in a bit. His 60° cut was wide, and did well deshrouding the valves, as well as my work to the chamber.
I'll probably CC the head tonight, just so we know if we want to use 2 base gaskets, or if the current work will drop the CR closer to the 9.5 goal. Stay tuned.
Last edited:
I heard this bike run today.....
He did! So did I. The FCR is a beech to kick. Gonna have to do some adjusting. Think I'm gonna run my XR's Only carb. Say away from them if you need your parts in less than 90 days.
Sent from my SM-N900T using Tapatalk
Sent from my SM-N900T using Tapatalk
"Oops, we forgot...."
Jesse, what was CR of that piston?
10.5 to 1, ceramic coated.
Sent from my SM-N900T using Tapatalk
Sent from my SM-N900T using Tapatalk