• Welcome to the Two Wheeled Texans community! Feel free to hang out and lurk as long as you like. However, we would like to encourage you to register so that you can join the community and use the numerous features on the site. After registering, don't forget to post up an introduction!

New Dual Sport Project - 1974 XL350 K0

Re: New Dual Sport Project

I finished painting most of the black parts. I'm sure I missed a bit here or there. I had a problem with the clear. The frame came out a little more glossy than I'd have liked and the other parts came out a little more matte, but they are probably closer to the original. You can't buy matte clear, you mix a flattening agent in with the clear and I think there is a little bit of an art involved.

HPIM1078.jpg


I've been doing a little bit of this and a little bit of that this weekend.

HPIM1079.jpg


HPIM1080.jpg


HPIM1081.jpg


I ordered new rubber for the battery box.

I disassembled and cleaned the shocks. They will need replaced, but I don't want to wait for new ones.

HPIM1070.jpg


HPIM1071.jpg


HPIM1072.jpg


I didn't have a shock disasembly tool so I rigged this up.

HPIM1082.jpg


They look pretty good and were okay on the road. I think they are probably too tired for any dirt riding.

Here's the finished triple tree.

HPIM1077.jpg


I'm waiting for a new seal to reinstall. I ordered a set of tapered roller bearings, but they didn't fit so I'm just going to use the orignal ball bearings.

I cleaned up and repaired the wiring harness.

HPIM1074.jpg


It was in pretty good shape except for some sheathing that had dried out. I replaced it with heat shrink.

The inside of the taillight mount was flaky after the rechroming. I cleaned it off the best I could with steel wool and a brass brush then sprayed it with silver to keep corrosion at bay.

HPIM1075.jpg


HPIM1076.jpg


HPIM1085.jpg


HPIM1086.jpg


HPIM1084.jpg


Those white cable ties are original Honda factory parts. Its a cool touch that adds so much to a project like this.
 
Re: New Dual Sport Project

I mounted the swingarm and shocks and installed the electrics under the tanks this afternoon.

HPIM1090.jpg


HPIM1094.jpg


HPIM1092.jpg


HPIM1095.jpg


HPIM1096.jpg


HPIM1093.jpg


Here's what the new tailight looks like.

HPIM1087.jpg


HPIM1088.jpg


HPIM1089.jpg


The fork tubes will be here Monday and spokes should be here the week after. Once the forks are done, I'll mount the lights. Then, All I'll need to do is replace the spokes in the wheels and I'll be ready to move on to the bodywork and then the engine.
 
Last edited by a moderator:
Re: New Dual Sport Project

I may have owned that very same bike, I sold it back in 2000 for 875.00 with 3500 miles on it, I bought it from the original owner in Mansfield, TX. back in 1999 for 400.00. He had it parked out in front of his store and i inquired about it and left my ph# and almost a year later he called and i went and bought it. The only difference i can see between it and yours is the original rear tire was still on it and was very worn tread wise. I still have a key to it, Let me find it and i will ck the # on it and PM you, If its the same as yours, I will mail it to you. It really looks like the bike i had. SZ.

Not the same bike, this one came from Iowa within the last couple of years.
 
Re: New Dual Sport Project

AAWW, Well thanks for the reply, The one i had was in such good shape too, The only thing i disliked was it would not pull a wheelie, not even in 1st gear, It had great power but just too heavy in the front, Other than that, It was a good fun trail bike. I turned mine into a new riding mower. SZ.
 
Re: New Dual Sport Project

I got a little garage time tonite.

The fork tubes and a bunch of new Honda parts came last night. The first thing I did was drive the races into the steering head. I'm using the original ball bearings because the tapered roller bearings I ordered didn't fit. They lasted this long in good condition so I guess they are okay.

HPIM1101.jpg


Here is one of the races in the headstock. I was worried about keeping all the bearings in the right place as I installed the steering stem, but it went on pretty easy.

HPIM1102.jpg


Here's the bearing cup and ball bearings. 18 each top and bottom.

HPIM1104.jpg


Here is the seal and washer that goes on first. The first seal did its job as there was no rust in the steering head.

HPIM1106.jpg


Halfway on. I drove it on with a drift tapping a little on each side. It wasn't that bad a fit.

HPIM1107.jpg


HPIM1108.jpg


A little grease onto the race and the bearings are set into the grease.

HPIM1109.jpg


The steering stem installed in the headstock. The directions for tightening up the stem nut were different than I am used to. Usually, you torque it to some value, then back it off until one of those washers with tabs can be engaged. The manual said to tighten the nut "all the way down" then back off until the triple tree turned both directions without binding. I'm not sure what "all the way down" is but I tightened it pretty tight then backed off until it felt smooth.

HPIM1110.jpg


The top yoke installed.

HPIM1112.jpg


The new fork tubes from Franks Engineering and Maintenance.

HPIM1113.jpg


Frank's is low tech. No credit cards, just CODs with a money order or cashiers check. Apparently this is an invoice!

HPIM1115.jpg


The first thing I did was remove the nut from the end of the tube. I have new nuts so I wasn't real careful.

HPIM1116.jpg


dump all the oil out along with a short spring, a washer and a long spring..

HPIM1117.jpg


New Parts!

HPIM1118.jpg


The seal is held in by a circlip. Save yourself a lot of trouble and get a good set of circilip pliers.

HPIM1123.jpg


Usually I replace the circlips, but they are NLA from Honda and these look pretty good.

HPIM1120.jpg


I couldn't get the hex bolt out of the bottom of the fork slider--it just spun around so I had to get out the big boy. Once the hex bolt was out I could seperate the tube from the slider and take out the fork pipe and oil lock. Both were in good shape. I did replace the fork piston rings which are small fiber rings around the fork. The fork was really gunked up. I cleaned it out as best I could with turpentine, but I'll change the fork oil at close intervals a few times.

HPIM1124.jpg


I used an old seal to drive the new seal into the slider. I used a piece of pvc pipe as a seal driver. You just have to find one that fits. I think it was 1 1/2".

HPIM1121.jpg


Then I did the next one--this one has blue paint on it from the gas tank. I guess they didn't even remove it when they painted it.

HPIM1122.jpg


Had to use air again. The second fork had been apart because the springs, a long and short one, were reversed. This is a low tech version of a progressive spring. One is wound tighter than the other. Anyway, they were reversed and the washer that goes between them was on top of both of them. The second fork also had a lot more oil in it and it was plain motor oil and it wasn't as gunked up as the first one.

HPIM1126.jpg


HPIM1127.jpg


The forks installed in the triple tree. The triple tree bolts are NLA so I cleaned them up as best I could and used new washers and nuts.
 
Re: New Dual Sport Project

Man, excellent work, excellent detail. :clap:

Can't wait to see the finished bike :eat:

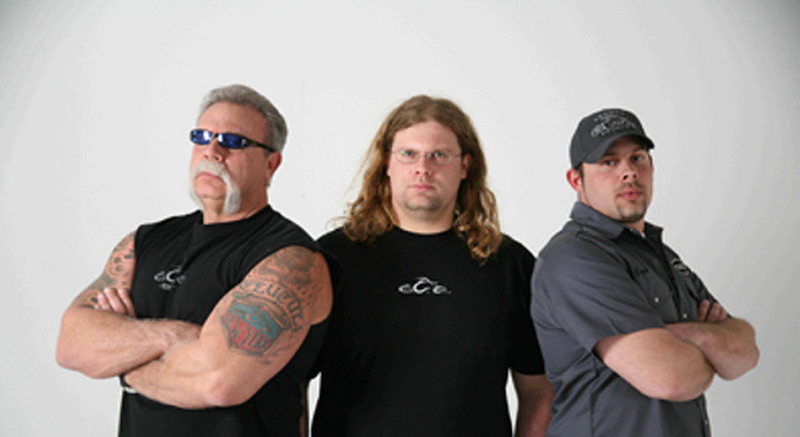
Hook up with these guys and do some episodes of bike overhaulin':

426647189_RKdTH-XL.jpg


Bob
 
I've been working on the front end of the bike this week. I found NOS switch gear for both sides, but the right side turned out to be for a K1 model which is different than the K0. The K0 incorporates the high/low beam switch into the on off switch so you can end up turning the lights off when you want to go from high to low beam. The K1 puts the high/low beam on the left switch and the on/off swich on the right side. I'll have to look for the correct switch. In the meantime I'll use the one that came on the bike even though the kill switch doesn't work.

HPIM1128.jpg

The K1 switch. Looks good huh? I can't just paint it because its anodized.

HPIM1132.jpg

The original switch--kinda faded.

HPIM1135.jpg

The left switch.

HPIM1129.jpg

The instruments. The tripmeter doesn't work so I'll be looking for a replacement. This one will do for now.

HPIM1133.jpg

The lower front brake cable guide is new. The upper is being rechromed as they are no longer available. The inner rubber is new for both as are both throttle cables, the clutch cable, choke cable and front brake cable. The tach cable and rear brake cable are no longer available from Honda, but I found a NOS tach cable on ebay.

HPIM1137.jpg

I've been sanding the bodywork too. This fender isn't original to the bike--its from a XL250. I hope to shoot it silver this weekend.
 
I think garage time is going to be a a premium as we get into the holidays. I managed about an hour and a half this week and what a cluster it was. I was kinda in a hurry because I didn't have much time. I had installed the cables in to the levers last week and this week I was going to clean up the rims and brake drums so I could put the wheels on the bike. Unfortunately, last week I mounted the cables from the front end of the bike and mixed up left and right. I put the clutch cable in the brake lever and the brake cable in the clutch lever. That caused all kinds of problems.

HPIM1139.jpg


HPIM1143.jpg


A before and after shot of the drums. The hubs were the same way and I was able to get them cleaned up.

HPIM1141.jpg


I was going to change the brake shoes, but the fronts are NLA from Honda and I haven't been able to find any on e-bay or aftermarket. Turned out they have a lot of life left anyway.

This is where it all went down hill. I mounted the front wheel and grabbed the brake cable to attach it to the brake drum (I'm in front of the bike again so I'm consistently stupid at this point). It mounted easily, but was waay too long. Then I realized what I'd done and I'd have been alright if I'd just thought it all the way through. Instead of switching the cables, I just grabbed the end of the opposite cable, and tried to attach it to the drum, but it just wouldn' go on. I messed with it for a long time before I just gave up and went into the house.

Today I looked at the pictures before I took the bike apart and realized the end of the cable I was trying to attach didn't look like the cable I took off the bike. That's when the light went on! Ten minutes and the brake cable was mounted and the brakes adjusted.

HPIM1145.jpg


HPIM1144.jpg


This is the old tire, I'm not going to put the new tire on until I get the rim relaced.

HPIM1146.jpg


I don't think I'm going to try to steal garage time again.
 
I worked on the bodywork today.

HPIM1147.jpg


The trim on the fenders turned out to be decals. Somewhere in the past,someone painted over them.

HPIM1148.jpg


I used paint thinner to soften the decal glue, then scraped them off. I still had to sand quite a bit to smooth them out.

HPIM1152.jpg


the bottom of the tank was really rusty and I wanted to address that. I sanded, but it was pretty pitted and still rusty.

HPIM1151.jpg


I used a 5 percent solution of nitric acid and sanded again and rinsed with acid and sanded again until it looked pretty good.

HPIM1156.jpg


HPIM1159.jpg


HPIM1163.jpg


There was no bondo in the tank, but one ding which I ground.

HPIM1154.jpg


and filled.

HPIM1155.jpg


Then I primed everything with a pretty thick coat.

HPIM1169.jpg


HPIM1168.jpg


Then I wet sanded with 320 grit and glazed the rough spots.

HPIM1167.jpg


HPIM1166.jpg


I'll prime again, then sand with 400. Then prime again and sand with 500 before I shoot the silver color. I'll let that dry for 3 days or so then use 00000 steel wool on it and shoot the blue. I'll let that dry for another 3 days and shoot the black pinstripe. After a week I'll apply the decals and shoot the clear. I could shoot all the colors at one time, but I don't want to get in a hurry and screw something up. If I don't apply the second and third colors with a couple hours I have to wait for it to completely cure.
 
I spent an hour or so this morning filling small inperfections with glaze and that's when I noticed there is another dent in the tank. Its a couple inches across and very shallow. I decided to leave it because I didn't want to put that much bondo on it. Its on the right side of the tank closer to the back than the front. You can't really see it now, but when I put the clear on it'll be visible--sorta "that doesn't look right", but it won't stand out.

I never had to repaint the underside of a gas tank before and I was at a loss as how to do it. I gues the best way would be some kind of mechanism that lets you turn it over, but that seems like a lot of effort for one tank. In the end I decided to finish the outside of the tank entirely, then mask it off and shoot the underside later.

HPIM1175.jpg


The fenders came out pretty good considering I chewed the plastic up trying to get those **** decals off. It took a lot of wet sanding to get them smooth again. The contrasting paint area on the fenders is very small so I think I'll get an airbrush to do them.

HPIM1176.jpg


HPIM1177.jpg


This paint is meant to have a clearcoat so its not really shiny until you shoot the clear. I've been pretty lucky spraying outside--no leaves or bugs have messed anything up so I've had to redo it again. You get a spec or two of dust, but I've never been able to avoid that in a paint booth either.
 
My first time spraying anything was my first commissioned built-in cabinet. It was this time of year, and I had to do it outside. No wind, but I was losing sun light. Got them done and left them a few hours to dry. Went to bring them in and discovered they were covered in ice. I felt sick. I was already behind with the job. Anyway, brought them inside, checked on them the next morning expecting to start sanding, and the finish was shiny and smooth.

Your attention to detail on this bike is inspiring. Can't wait to see it finished.
 
Well, good and bad news this week so far. First, I started to mask off the tank for the blue paint and decided I just couldn't live with it as it was. I put the gas cap on the tank and stuck an air hose into the petcock hole and gave it about 80 psi and it actually pushed most of the dent out of the tank. There was a little mark right in the middle so I ended up filling it.

HPIM1184.jpg

Now, I'm back to here. I hope to get it sprayed tonight or tomorrow so I can do the blue paint this weekend.

HPIM1183.jpg

There's some good news though. My new clutch lever arrived from Thailand. Why are there so many NOS Honda parts in Thailand?

Also a guy on the XL forum has a NOS light switch for a K0 and needs one for a K1 so we're going to trade.
 
I resprayed the tank so it'll be ready for the second color next week. I spent a couple hours trying to mask the fender for the blue paint and black pinstripe, but I've come to the conclusion that I can't do a professional job with that so the fenders are going to end up monocolor.

I am about finished with the rolling chasis except for respoking the wheels so i'm going to put it together when the body work is done and start on the engine.

HPIM1214.jpg


I'm working on the left side of the engine, here's what it looked like when I started.

HPIM1220.jpg


I got it cleaned up and installed a new countershaft sprocket. Getting the old gasket off the mating surfaces was the hardest part.

HPIM1219.jpg


The old sprockt was held on by two bolts, while the new one is held on by a clip.

HPIM1224.jpg


Then I started on the head. I'm going to strip the cylinder head and barrell to check the valves and rings.

HPIM1221.jpg


Here's the point cover, points, spark advancer and valve adjust covers.

HPIM1223.jpg


One of the covers before and another after cleaning and polishing. I used 220, 320, 400, 500 and 600 wet sand paper with polishing compound then a buffing wheel to get it shined up. I have a new old stock points cover so I won't clean this one.

HPIM1229.jpg


The cam looked good and I think the head looks good. The cam runs on plain bearings (no bearing at all) in the head so lubrication is important. Not enough and the cam literally eats the head. I think this one looks good, but I'm no expert so I'll have to wait and see.

HPIM1217.jpg


I couldn't find the original dark gray with a green cast paint so I just used silver. It looks great if not stock. The head will be painted the same color and I'm trying to polish up the top of the head so I can leave it naked aluminm.
 
I fnished taking the head off today and took the head and cylinder to the machine shop along with fresh valve seals.

HPIM1232.jpg


HPIM1233.jpg


The head and cylinder came off pretty easily. I've had problems with the heads getting stuck on some of the four cylinder bikes I've worked on.

HPIM1234.jpg


The rings actually looked pretty good.

HPIM1235.jpg


Unfortunately, the piston has some scraping on the skirt.

It looks like I can get by with a honing of the bore if I can find a stock piston and ring set. It looks like it was running really rich whcih may have allowed gas to wash the oil off the piston/bore. That's something I'll look at closely when I rebuild the carb.
 
Thanks for sharing this rebuild with us. I enjoy checking on the progress of the bike. :clap:
 
Just curious, have you restored other bikes, and if so, what were they?
 
Just curious, have you restored other bikes, and if so, what were they?

I've done a few bikes. The most recent were a couple CB1100Fs. I bought one to restore and another as a parts bike. I didn't need as many parts as I thougth I would so I ended up restoring both. Since I had one stock I did the second one in black.

I've also done a CBX and I have a Honda SL100 waiting in the shed.

I didn't document any of the others to this detail.

HPIM0208.jpg

HPIM0365.jpg

HPIM0366.jpg

HPIM0368.jpg

HPIM0392.jpg

HPIM0388.jpg

HPIM0386.jpg

HPIM0402.jpg

HPIM0405.jpg

HPIM0415.jpg

HPIM0416.jpg

HPIM0418.jpg

HPIM0420.jpg

HPIM0432.jpg

HPIM0430.jpg

HPIM0436.jpg

HPIM0442.jpg

HPIM0452.jpg

HPIM0458.jpg

HPIM0457.jpg

HPIM0456.jpg

HPIM0465.jpg

HPIM0460.jpg

HPIM0631.jpg

HPIM0632.jpg

HPIM0637.jpg

HPIM0675.jpg

HPIM0684.jpg

HPIM0686.jpg

HPIM0837.jpg

HPIM0854.jpg

HPIM0855.jpg

HPIM0864.jpg

HPIM0867.jpg

HPIM0929.jpg

HPIM0930.jpg
 
Back
Top