• Welcome to the Two Wheeled Texans community! Feel free to hang out and lurk as long as you like. However, we would like to encourage you to register so that you can join the community and use the numerous features on the site. After registering, don't forget to post up an introduction!

The DR/DRZ Thread

I would stay away from Clarke for a DRZ 400S. I couldn't get the chole to fully engage without doing so Southern Engineering.

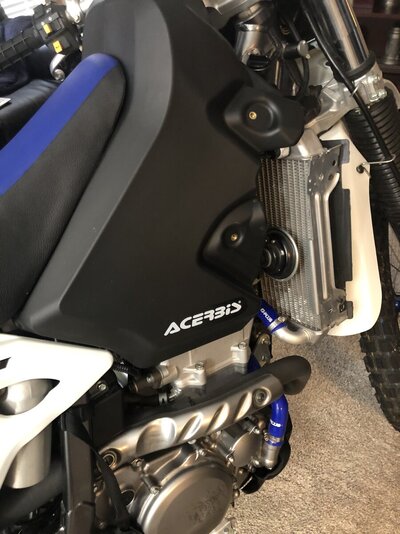
I 've had much better luck with the Acerbis tank

Okay. I read the opposite on reviews. That the Clarke fit perfectly and the Acerbis didn't. Good to know. Maybe that's why the Clarke is cheaper.
 
Anyone have suggestions on fuel tanks? I've been reading reviews on all of them. Some fit, some don't without modification. Some work with the stock petcock and some don't. Clarke, IMS, Acerbis.......
gtimco 1012 is right about the modification needed on a Clarke tank. You have to saw or grind off part of the choke knob, but it's an easy and quick fix with just a hacksaw blade. Saying that, I bought a new "clear" Clarke tank for my last DRZ just so I could see the fuel level. I have the old black tank available for a $100 donation to the TWT forum. It fits on the S and SM without modification except the choke knob. The petcock issue is true on more than just the Clarke. It's just requires you to reroute the fuel line, but a better solution is to replace your petcock with a manually operated petcock because there is a known defect with the diaphragm on the on the stock petcock when using ethanol.
 
Okay. I read the opposite on reviews. That the Clarke fit perfectly and the Acerbis didn't. Good to know. Maybe that's why the Clarke is cheaper.
Gabus: I got it to work--- but I had to put additional washers ( I think at the back part of the fuel tank to elevate it which allowed the choke lever to fully engage.
 
When I spend $300 plus on a product I expect it to fit flawlessly. I shouldn't have to add or modify anything. That's just me. Especially for a bike that hasn't changed in 21 years. So Clarke is no good. Guess I'll roll the dice on a Acerbis or IMS tank. I'll keep reading.
 
I am using a Clarke tank on a DRZ. Except for trimming the choke knob which took about 2 minutes to do, the tank has worked great for almost 10 years. The only thing I have to do is replace the fuel cap which cracked after 5 or 6 years.

Sent from my SM-T350 using Tapatalk
 
When I spend $300 plus on a product I expect it to fit flawlessly. I shouldn't have to add or modify anything. That's just me. Especially for a bike that hasn't changed in 21 years. So Clarke is no good. Guess I'll roll the dice on a Acerbis or IMS tank. I'll keep reading.
No need to roll the dice on the Acerbis. I had installed a 3.7 last year- no issues. Except remember to cap the old vacuum line at the carb. The Acerbis doesn't use it. If you dont, it wont run well.
 
There is a small alignment tab on the carb mouth that lines up with a slot on the manifold boot. The carb tab may be in the slot, but there is 5-8 degrees of play in the slot. If the choke knob hits the tank, just loosen the carb boot clamps and rotate the carb to the other end of the slack in the slot.
 
There is a small alignment tab on the carb mouth that lines up with a slot on the manifold boot. The carb tab may be in the slot, but there is 5-8 degrees of play in the slot. If the choke knob hits the tank, just loosen the carb boot clamps and rotate the carb to the other end of the slack in the slot.
Where where you when I was sawing off the corner of my choke knob?:-P
 
I have a bunch of farkles getting delivered this week (tires, rim locks, skid plate, bigger tank, bars, risers, levers, grips, filters, usb plugs, etc..). I feel totally confident doing everything other than tires, rim locks since I don't have any experience there. I bought three spoons, rim protectors, but I don't have a stand or balancer. Should I attempt it on my own or pay the local MC shop?

drz.new.tank.jpg


New tank and graphics.
 
Ther'e a bunch of good videos out there and what you have is what you'd have out on the trail. one of those dealies (that's a technical term) that screws onto the valve stem to pull it through the rim or hold it is nice, but not absolutely necessary. I bet if you ask nice, there's someone in your area that would be willing to walk you through it. You do need to use caution to not pinch the tube. I don't think I know anyone that balance dirt or DS tires.
 
If you don't know how to do tires, it's better to learn in your garage now in this weather than learning in the middle of August on the side of a trail.
 
I have a bunch of farkles getting delivered this week (tires, rim locks, skid plate, bigger tank, bars, risers, levers, grips, filters, usb plugs, etc..). I feel totally confident doing everything other than tires, rim locks since I don't have any experience there. I bought three spoons, rim protectors, but I don't have a stand or balancer. Should I attempt it on my own or pay the local MC shop?

View attachment 286663

New tank and graphics.

I am also adding new goodies soon. Jet Kit, Full Exhaust and Acerbis Tank. Let me know how the tank installation goes....
 
Will you be doing the 3X3 airbox mod?
Yes, heat the box with an air dryer and cut with a razor blade. The hardest part so far is removing the screws to disassemble the carb. I've stripped them out. My only saving grace is needle nose vice grips. Replacing the carb needle was fairly simple. Removing the carb from the rubber air boot wasn't bad. Jets don't look hard. Installing a new Acerbis tank and using the petcock they provided. See how that goes. Have MRD full exhaust on order.
 
MRD is certainly a good quality product. Pretty loud though without the db killer in, not too bad with the db killer. I had one on my previous SM but have stayed stock on my current E model.
 
Yeah those screws are made out of butter and they're JIS so phillips driver fits just enough to strip the head. Just the jetting and 3X3 will be a noticeable improvement. When you get the MRD exhaust on it will add another 3 or 4 horsepower. Then you'll be looking to a Keihin FCR39 or 41 for another 3 to 4 horses then it will be a big bore and maybe a stroker so better go for the fcr41. It's a neverending rabbit hole with lots of company.
 
Yes, heat the box with an air dryer and cut with a razor blade. The hardest part so far is removing the screws to disassemble the carb. I've stripped them out. My only saving grace is needle nose vice grips. Replacing the carb needle was fairly simple. Removing the carb from the rubber air boot wasn't bad. Jets don't look hard. Installing a new Acerbis tank and using the petcock they provided. See how that goes. Have MRD full exhaust on order.
Lowes will have the screws in stock, usually they have both Phillips and Hex head. Take an old one with you.
 
You can remove and replace the carb without hinging the subframe, but it is rough on the boots. The last thing you need is a torn boot and vacuum leak. I have done it both ways, but its eaiser to just pop off the muffler, remove the bottom subframe bolts loosen the top ones and hinge the subframe up.
 
You can remove and replace the carb without hinging the subframe, but it is rough on the boots. The last thing you need is a torn boot and vacuum leak. I have done it both ways, but its eaiser to just pop off the muffler, remove the bottom subframe bolts loosen the top ones and hinge the subframe up.
Interesting. I've always pulled the top bolt and hinged it down just a bit. Saw a video about that method. I can get the carb out but it's a little difficult. I'm trying this way next time.
 
I trashed those carb screws. Couldn't budge them with a pair of vice grip wrench. So I have a Craftsman hand held Impact Driver that finally dug those *******s out. Finally finished up jetting. After cursing for 30 minutes installed carb and correctly attached to the air boot. 3 inch hole in the air box was easy.

On to the new Acerbis tank. Washed it out with some gas. Attached the petcock and gas is pissing everywhere. I start looking at it and I'm missing the rubber O ring that sits down on the petcock. Ugh. I'm 100% sure it wasn't in the package. Order more from Acerbis.

Bit frustrated as I wanted to get my bike started today and actually see if it ran correctly after the new jetting and air box mod.
I run the 4 gallon acerbis and you should note that the tank snubbers on the frame do not properly secure the tank, design flaw... A visit to a local hardware store for some rubber plugs and adapted to fill the void should work. I still need to make mine. It does seem ok once the radiator shrouds are secured, but i would not want to trust those forever, to keep my tank secure. I did the jet kit on mine, along with the fuel screw, because during the hot months the bike had a miss or bog when opening the throttle, like to pass someone on the freeway. I used the JD kit, stock exhaust. It sounds a little better with the hole cut in the top of the airbox, and the hesitation is gone with improved throttle response. Its not any faster, just seemed smoother and more reliable when the throttle is opened.
 
Tank was a good fit. For the stock seat insert to slide into the metal plate on top of the tank I had to drill out the plastic hole for additional space. Wasn’t bad. Intending to order an aftermarket seat to replace this 2x4
 

Attachments

  • 4E0198AF-CE49-4565-8F2A-203D261C2588.jpeg
    4E0198AF-CE49-4565-8F2A-203D261C2588.jpeg
    173.8 KB · Views: 146
Back
Top