• Welcome to the Two Wheeled Texans community! Feel free to hang out and lurk as long as you like. However, we would like to encourage you to register so that you can join the community and use the numerous features on the site. After registering, don't forget to post up an introduction!

KLR650 Thread

"the portion of the fuel line nearest the petcock"

I Googled for some information. One site said that his local Kawasaki dealer recommended replacing the petcock diaphragm every two years. One owner had a part of his petcock gasket stuck under the float valve causing it to leak. That convinced me to change the petcock out. So, I ordered a non vacuum replacement from Eagle Mike's and a inline filter.
Bet you win your dollar.

Robert
 
Interesting. I think Eagle Mike has a plate that you can use to replace the gasket. I believe that will bypass the vacuum in the petcock. But if you talked to him on the phone I'm sure he got you what you need.
My KlR sputtered one day after a ride and he believed that was it. But when I put it on reserved then back to on its been fine ever since. But he recommended the plate in the future cause if that gasket goes out in the middle of no where you could be screwed. My KlR is under warranty still and I have roadside assist but I should prolly stop by and pick one up next time I'm in Cali and get the specifics from EM.
Hope that fixes your leak and you get to ride soon.

Get the plate...I'd advise that for everyone. And change out those pesky glass fuses if you haven't done so already.....:sun:
 
Glass fuses ?

On the older bikes, the main power fuse and headlight fuse are old glass tube type fuses.....best upgrade to more durable automotive blade type, and I bought those with weatherproof covers, too.....:sun:
I got caught out at night without a headlight ONCE........not really a safe proposition out here in the country....:deal:
 
I see. Welcome to the future.....:mrgreen:

Yeah mines got that new fangled bulb, lights up the sky.
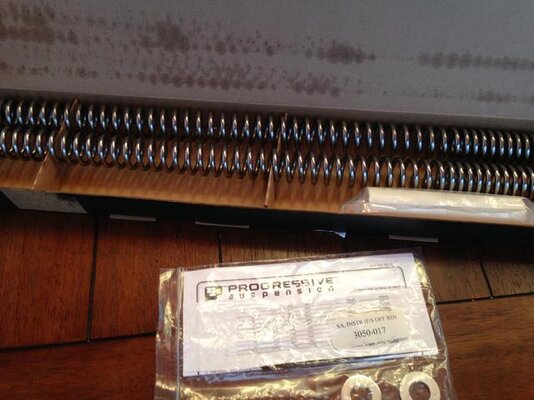
I had thought I would put my new progressive springs in today but ran out of daylight. But I did take a quick spin with the new pivot pegz and must say that they are all that and the bag if chips. Well compared to the stock pegs. Can't wait to get them dirty.
 

Attachments

  • image.jpg
    image.jpg
    44.7 KB · Views: 243
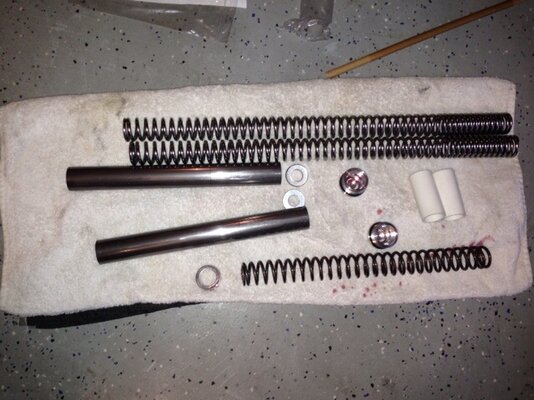
Added the Progressive fork springs last night and got to try them out today. Gotta say I'm real happy for the minor twenty minute upgrade.
I also got some 15 Wt fork oil I'll put in in the next week or so. Highly recommend them. Oh and the pivot pegz keep my boot from shifting smooth. Kept getting stuck on the lower buckle. Gonna try another set of my boots.
 

Attachments

  • image.jpg
    image.jpg
    119.5 KB · Views: 228
Added the Progressive fork springs last night and got to try them out today. Gotta say I'm real happy for the minor twenty minute upgrade.
I also got some 15 Wt fork oil I'll put in in the next week or so. Highly recommend them. Oh and the pivot pegz keep my boot from shifting smooth. Kept getting stuck on the lower buckle. Gonna try another set of my boots.

+1 on the progressive springs.....
 
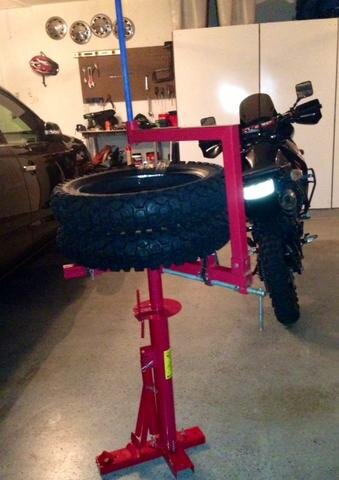
Got my Tire Changer back. Anyone have pix on how you floor mounted it? I used to mount it to my joe Hauler, but want it here at home.
That bead on the rear of my KLR is a biscut to brake.
 

Attachments

  • Tire changer.jpg
    Tire changer.jpg
    26.1 KB · Views: 242
Got my Tire Changer back. Anyone have pix on how you floor mounted it? I used to mount it to my joe Hauler, but want it here at home.
That bead on the rear of my KLR is a biscut to brake.

I used three wedge-type anchors to stick it to the concrete. One rear, and two on the sides. Leave the front one missing, and while you are down there, cut that piece of angle iron off of the front leg. That way when you pop the bead of a tire it doesn't slide down the rim on that piece of steel and leave scratches. That was the best modification I ever did to my HF changer. So far it has logged a couple of hundred changes.
 
Thanks for the reply, I was thinking if drilling and using wedge type anchors or even pouring a small slab around back out side. Even thought of fabricating a steel plate mount to slide it into. Looking for a quick way to set it up them remove it. So far three wedge anchors sound quickest. I just would like to avoid any protrusions.

I use a 1/4 inch piece of ruber to lay down on the triangle and old inner tubes line the rim mounts to prevent scratches.

I've seen where guys mount it to a 3/4 inch plywood board then stand on the board when swapping out. But then I gotta store the board. Outta sight outta mind quick hook up and quick disconnet is what would be cool.
 
There are also sleeve anchors that once you remove the item and replace the bolt into the sleeve, all you have sticking up is a bolt head.

For me, I just left mine setup in the garage since it does seem to get pretty frequent use.
 
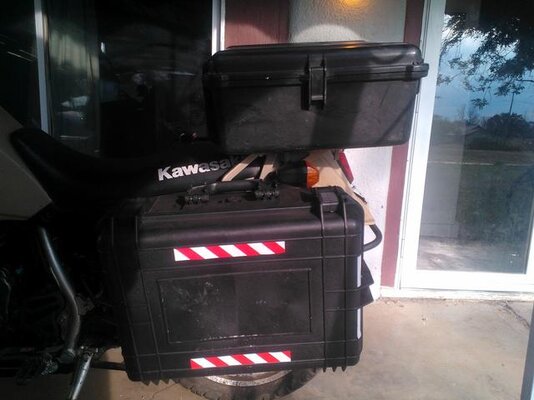
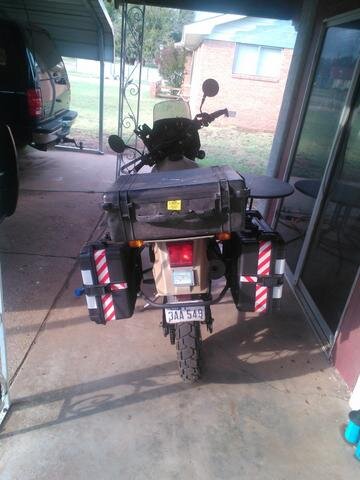
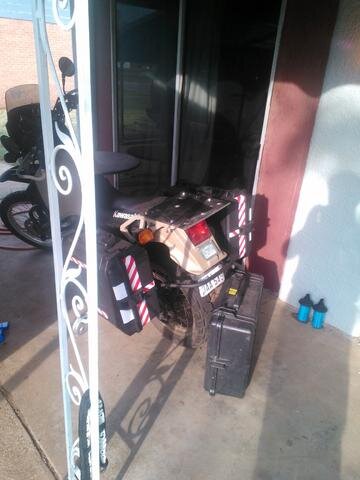
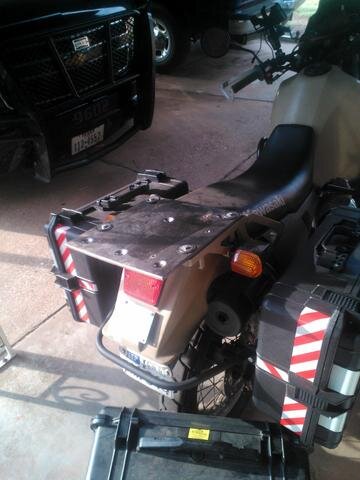
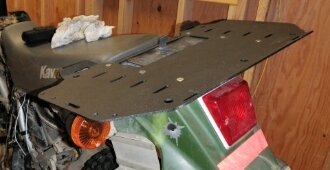
made my own cargo rack for my KLR...used an old mounting plate from an old mobile vision dash-camera we had in the office garage. I wish it was wider but for the price (free) I can't complain too much.

I am planning on mounting this box (in the 3rd pic) that I have setting up on top there for the picture.
I am still not sure how far forward I want to mount it... I don't really want to have to remove the box to pull my seat if I need to service something while on the trip. The box wont stay on 24/7...only used for long trips.
 

Attachments

  • WP_000656.jpg
    WP_000656.jpg
    36.4 KB · Views: 252
  • WP_000655.jpg
    WP_000655.jpg
    28.4 KB · Views: 244
  • WP_000654.jpg
    WP_000654.jpg
    25.9 KB · Views: 241
  • WP_000653.jpg
    WP_000653.jpg
    28.2 KB · Views: 244
made my own cargo rack for my KLR...used an old mounting plate from an old mobile vision dash-camera we had in the office garage. I wish it was wider but for the price (free) I can't complain too much.

I am planning on mounting this box (in the 3rd pic) that I have setting up on top there for the picture.
I am still not sure how far forward I want to mount it... I don't really want to have to remove the box to pull my seat if I need to service something while on the trip. The box wont stay on 24/7...only used for long trips.

That's a nice mount for free. If you want to spend a few bucks, Eagle Mike makes a nice rear rack that even guards your rear signal lights if by chance your KLR takes a nap.
I've held one of these when i was at his shop and its made tough. $79 bucks.

More pix here http://www.eaglemike.com/Rear-rack-for-A-Model-1987-2007-RCDR.htm

Wide enough for that box you have and if you see the set up and mount it far enough back you can still access under your seat.
 

Attachments

  • Eagle mike rear rack mount plate.jpg
    Eagle mike rear rack mount plate.jpg
    45.3 KB · Views: 242
There are also sleeve anchors that once you remove the item and replace the bolt into the sleeve, all you have sticking up is a bolt head.

For me, I just left mine setup in the garage since it does seem to get pretty frequent use.

yeah I thought that if I could have the sleeve threaded and remove the bolt i'd just have three flush hole to walk over.
Thanks for the input.
 
That's a nice mount for free. If you want to spend a few bucks, Eagle Mike makes a nice rear rack that even guards your rear signal lights if by chance your KLR takes a nap.
I've held one of these when i was at his shop and its made tough. $79 bucks.

More pix here http://www.eaglemike.com/Rear-rack-for-A-Model-1987-2007-RCDR.htm

Wide enough for that box you have and if you see the set up and mount it far enough back you can still access under your seat.

I am planning on buying a "real" rack here pretty soon and I would prefer to support eagle mike vs a larger supplier. Thanks for the link.

I had to cobble together my rack because I was on a time crunch. I have a trip planned for this weekend (fri-sun). Had I ordered a rack, it would not have arrived before this weekend since today was a holiday.
 
I used three wedge-type anchors to stick it to the concrete. One rear, and two on the sides. Leave the front one missing, and while you are down there, cut that piece of angle iron off of the front leg. That way when you pop the bead of a tire it doesn't slide down the rim on that piece of steel and leave scratches. That was the best modification I ever did to my HF changer. So far it has logged a couple of hundred changes.

Got a photo? Sounds simple enough but not haveing a tire machine I do mine on the deck of the shop.
 
Got a photo? Sounds simple enough but not haveing a tire machine I do mine on the deck of the shop.

Just a photo of how it is mounted? I didn't have one, but I do now.:-) The only other things I have done to it in order to make my life easier is to weld two pieces of pipe to one of the legs in order to keep track of the rods that go down through the axle, and a little box has been welded to the top arm of the machine to store tire irons in a convenient place while changing tires. The old rag sits over the front leg to keep wheels scratch free, and the block of wood keeps rotors off of the concrete and up in the air during bead breaking.

Excuse the mess, but the tire changer doesn't get cleaned very often.

4D8E545A-B9C4-4FB2-BD64-69A500FB8B8D-3891-000002A12E252F5B_zps78064c40.jpg
 
Hey thanks for the pix.
one question, you dont use the tire removal tool that came with the tire changer? Or do you use the tool, with a tire iron to start the process instead of a bead buddy or do you just use tire irons?
I've done all three but I'm gonna try to protect the rim with milk carton plastin zipped tied to the tool.
 
I am planning on buying a "real" rack here pretty soon and I would prefer to support eagle mike vs a larger supplier. Thanks for the link.

I had to cobble together my rack because I was on a time crunch. I have a trip planned for this weekend (fri-sun). Had I ordered a rack, it would not have arrived before this weekend since today was a holiday.


Hey dont get me wrong, I like that free mount.
Just saying if you want a wider one for that wider top case the one from Eagle Mikes is sweet.

Eagle Mike is a large supplier, but he's an even larger supporter of the KLR rider. That guy will answer all your questions and concerns not just about the rack but about the KLR.

On another note that free rack you got would fit inside one of those soft rack bags and make for a super stable mount from the inside. I've done it with plywood before so I could attach the tool bag to the inside of the top bag before mounting to keep it more secure. A tip I got from a friend in Cali who did it.
 
Hey thanks for the pix.
one question, you dont use the tire removal tool that came with the tire changer? Or do you use the tool, with a tire iron to start the process instead of a bead buddy or do you just use tire irons?
I've done all three but I'm gonna try to protect the rim with milk carton plastin zipped tied to the tool.

Oh I most certainly use the mount/dismount bar, with the irons to keep the bead where it needs to be to start things off. Most of the tires I do are mag wheels so there is nothing to hook a bead buddy onto. Here are the rest of my pictures from years ago about my HF machine.

IMG_1606.jpg

Rim protectors for the dismount portion of the process.

IMG_1605.jpg

An old rim protector that has been cut down and ziptied to the mount end of the bar. This makes is much easier to mount a new tire instead of using the rim protectors which effectively increases your diameter and makes mounting a tire that much harder.

IMG_1607.jpg

And THIS is the difference between a difficult tire change and an easy one. If you go to Napa, do not buy the cheaper alternative to this. The cheap one is blue and doesn't work worth a darn. In fact if anyone doesn't believe me, I have an almost full gallon of the stuff that I will give away.
 
Hey thanks for the pix.
one question, you dont use the tire removal tool that came with the tire changer? Or do you use the tool, with a tire iron to start the process instead of a bead buddy or do you just use tire irons?
I've done all three but I'm gonna try to protect the rim with milk carton plastin zipped tied to the tool.

I use the big bar that came with the HF changer for car/tractor tires...but not much. Three smaller tire irons just work a lot better for me and seem easier on the tire. As DFW says, Ruglide! It works. For moto tires, three way smaller tire irons works...still takes me half an hour and two skint knuckles but that's just cause I don't know what I'm doing most of the time. That HF changer is one of the best $39 spent so far.

We poured a 4x4 cement slab to mount it on with bolts sticking up from the slab. If I had it to do over, I'd use your approach and put some threaded sleeves in the slab to avoid the bolts/scratches.
 
Back
Top